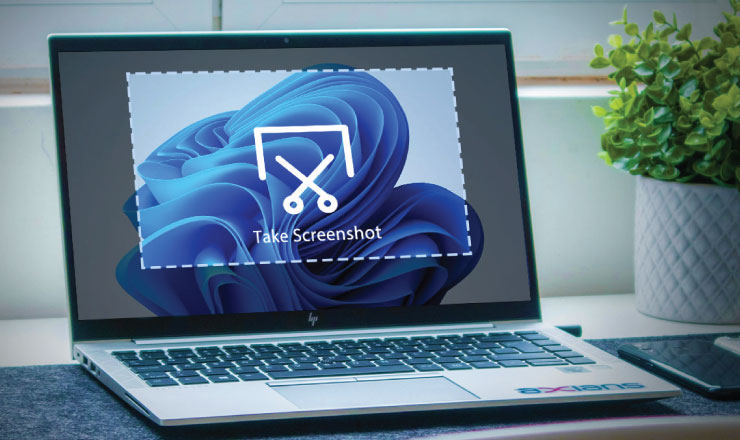
How to Screenshot on Dell laptop? How to take a screenshot on hp laptop? Don’t worry, Almost all windows laptop methods of screenshots are the same so, read this full guide.
A screenshot is a unique application that allows you to capture an image of your screen in seconds. We all take screenshots every day on our smartphones and tablets, but have you ever taken a screenshot on laptop screen? Well, taking a screenshot on your laptop might not be as hard as you think it is. It’s the opposite of difficult because now, there are plenty of ways using which Laptop users can take screenshots without any hassle. It’s a simple process that will allow you to take as many screenshots as you want on your laptop.
Throughout your day, you will find a need to capture your laptop’s screen to save that work for later. Whether you have a Window’s powered laptop, PC, or Mac, you can still take screenshots and save them onto your device. Both Windows laptops and macOS come with their ways of taking screenshots and you must know them. Have no idea about most of them? No worries because we have got you covered!
Different Ways – How to Screenshot on Hp Laptop & Desktop Computers?
Today, we will share multiple ways How to screenshot on laptop? with you. All of the steps are easy to follow and this method is for Windows 7, 10, and 11 laptops as well. Here’s how:
How to take a Screenshot on Windows Laptop using an App?
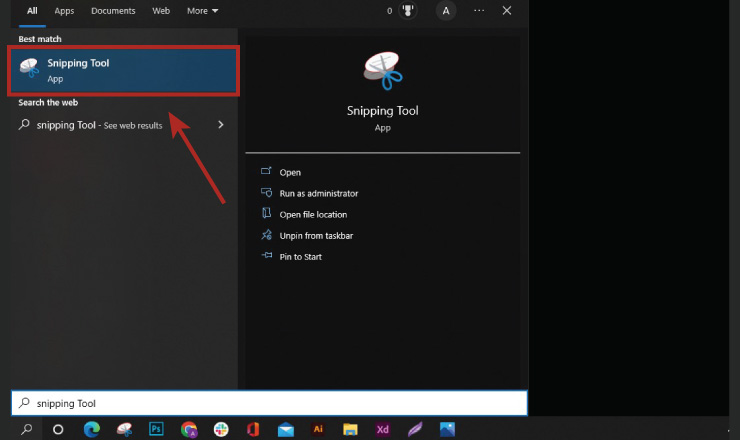
If you didn’t already know, Windows 10 and 7 both come with an app dedicated to taking a screenshot on laptop called “Snipping Tool”. This app will enable you to grab a screenshot of your screen and save it on your device as an image file. You won’t even need to paste your image on another program first.
Search “Snipping Tool”
To take a screenshot on a Laptop with the app, go to the Start Menu on your laptop and search for “Snipping Tool”.
Application Bar
Once the application opens, you will see different options like “New”, “Mode”, “Cancel”, “Delay”, and “Options”.
Select Mode
The “Mode” option will help you choose the kind of screenshot you wish to take, for example, you can choose the shape and size of your screenshot.
“Delay” Option
The “Delay” option allows users to set a timer for taking a screenshot on laptop.
Click “New” Option
The “New” option will allow you to take a screenshot in a free form.
Capture Screenshot on Laptop using Alt + PrtScn:
- This method will only allow you to take a screenshot of the screen you are working on at that time. It will be saved to your clipboard which you can then easily paste to another program.
- By using the Alt + PrtScn key, take a screenshot on your Windows-7/10 Laptop.
Screenshot on Laptop by using “Print Screen” in Windows:
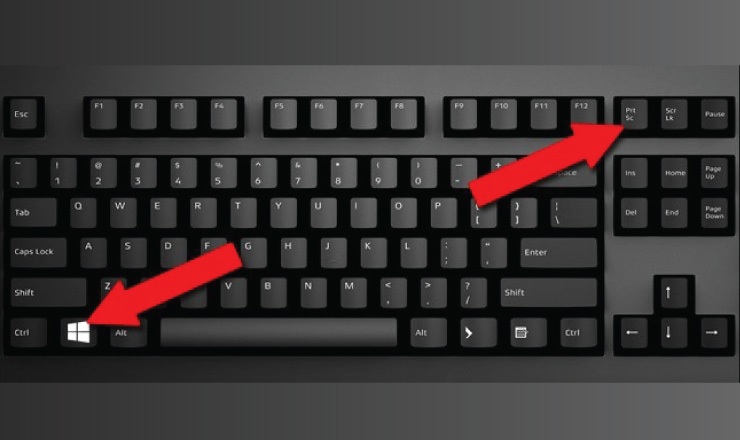
Apart from the Snipping Tool app, Windows also offers its users a chance to take screenshots of their laptop screens. You can use the “PrtSch” key. By using this option on your Windows-powered laptops you can print your screen. You will find this key on the top-right side of your keyboard.
- When you press this key, you will be able to take a screenshot of your entire laptop screen within seconds. The image will be saved to your device’s clipboard which you can later use on any other program you want, such as MS. Word, Paint, etc.
- If your laptop doesn’t offer this feature, try using the “Fn” function key. Click Fn+PrtScn and take a screenshot on any computer you have.
Take Screenshots of a Specific Portion using Windows Key + Shift + S:
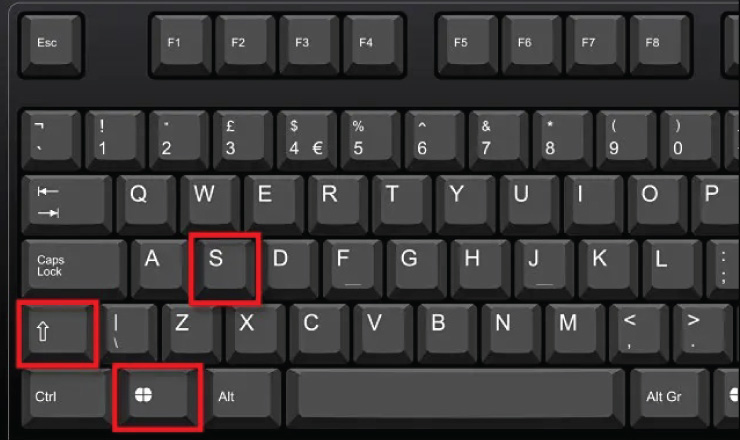
Do you want to capture a screenshot of a specific portion of your laptop screen? If yes, then here’s how you can do that;
- Just press these 3 keys; Windows + Shift + S.
- This action will immediately dim down your screen, open the Snip and Sketch tool on your laptop, and change the mouse pointer to drag.
- Now, you have to select the portion of the screen you want to screenshot.
- Once your screenshot is captured and saved to your device’s clipboard, you are free to upload it wherever you want.
Conclusion
There are plenty of ways using which Windows-powered laptop users can take screenshots on their devices. Not many people know these tips and tricks for taking screenshots that we have mentioned above in this article. All of them will help you completely capture your screen within seconds. On top of that, after knowing all the fast and efficient ways of taking a screenshot on a laptop, you can simply determine the type of tools you need for photo editing, cropping, and sharing those screenshots.
How to take a screenshot on laptop? If all you want to do is take a simple screenshot on your laptop, then the PrtSc keys will be sufficient to do the task. But, if you want to take a screenshot of a separate portion of your screen, then try using the Snipping tool. If you are looking for a way to share your screenshots with your friends, then just press Win + H Key. We hope you found this article on How to take a screenshot on a laptop helpful! If you have any queries, let us know in the comments section down below!
You May Also Like
How To Calculate Percentage? – 3 ways to calculate percentage
How to Change Gmail Password on Desktop, iPhone, and Mac?